Oracle E-Business Suite 12 Human Capital Management Certified Implementation Specialist – Question Bank
Oracle E-Business Suite R12 Human Capital Management Certified Implementation Specialist – Sample Questions
These questions are similar to the ones asked in the actual Test.
How should I know? I know, because though I got my Human Capital Management Certification several years back, I have re-certified with the latest version of the Certification test.
Before you start, here are some Key features of the Human Capital Management Certification Exam.
– The exam is Computer based and you have 120 minutes to answer 70 Questions.
– The Questions are (mostly) multiple choice type and there is NO penalty for an incorrect answer.
– Some of the Questions may have more than one correct answers. You must get ALL the options correct for you to be awarded points.
– The Official Pass percentage is 65% (But this can vary). You will be told the exact passing percentage before you begin your test.
Here are a few sample questions for you;
Sample Questions
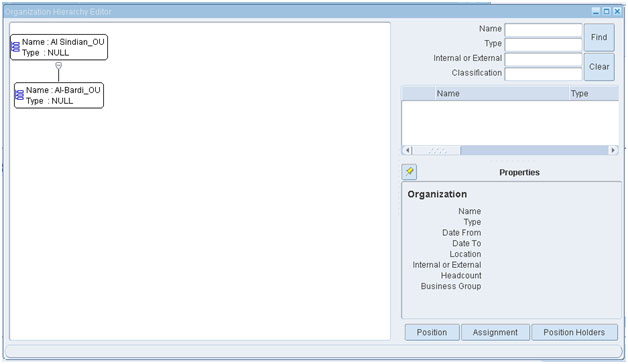
Q1) If you need to show your organization hierarchy in graphical screen, which screenshould you use?
a. Organizationhierarchy
b. Organizationdescription
c. OrganizationDiagrammer
d. None of them
Answer: c
OrganizationDiagrammer
Explanation
Organization Diagrammer:
Path Work Structures – > Organization ->Diagrammer
- Press F11 and write organization hierarchy name between 2 %%.
- Press Ctrl + F11 choose your hierarchy required.
- Press Open Editor (B).
When open editor can check your hierarchy in graphical screen when press in (+) sign under each node can show subordinates for this node.
Diagrammer allow you also add new subordinates for any node from left where it organizations defined before.
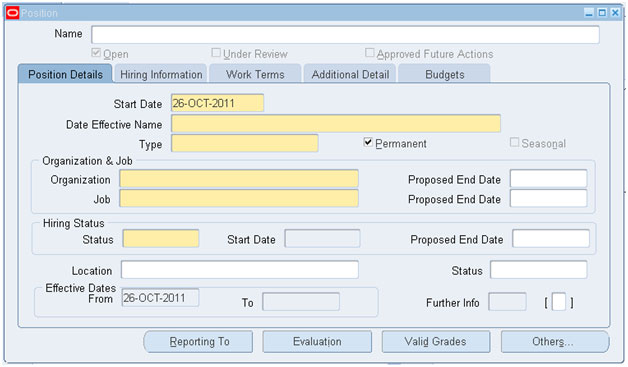
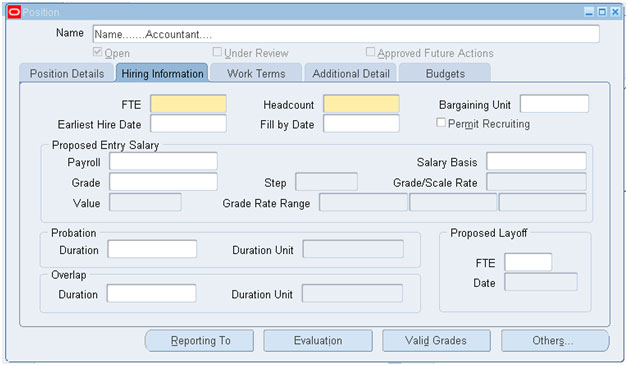
Q2) In which tab in position definition form canyou define probation duration and overlap duration?
a. Position details
b. Hiring information
c. Work terms
d. Additional details
Answer: b
Hiring information
Explanation
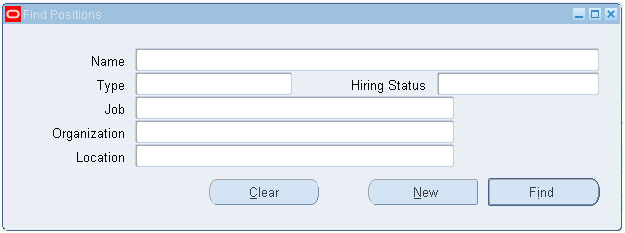
Define New Positions:
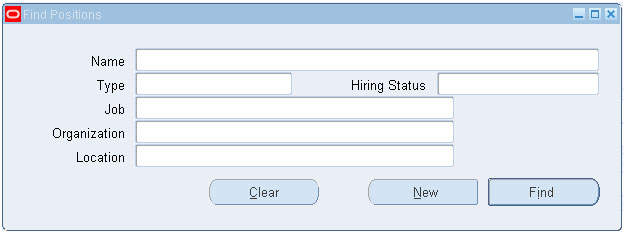
Path Work Structures – > Position -> Description
First look after press Description (B)
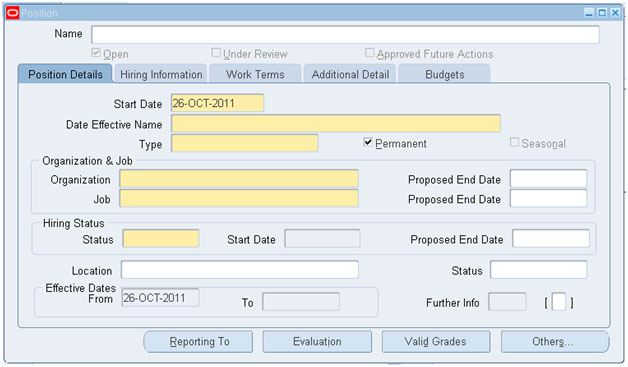
1- Now Press New (B).
2- Start Date filled automatic current date.
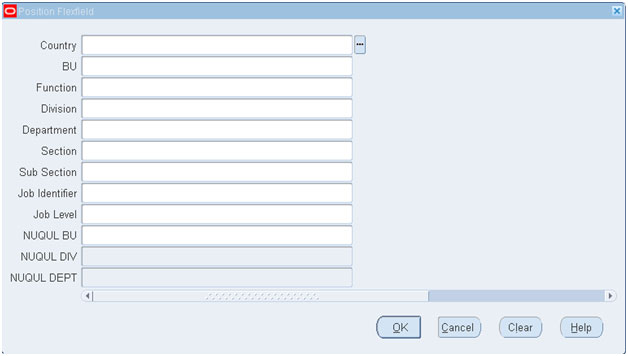
3- In Date Effective Name press on it to fill segments of position name.
4- Fill all fields then press Ok(B).
5- Then fill type of Position.
6- In Organization block fill Organization filed and Job filed.
7- In Hiring Status filled by status.
8- Note if type Shared
In hiring information tab
Define probation duration and overlap duration
9- Should enter values of FTE and Headcount.
Q3) In which path can you define levels of rating scales?
a. Work Structures – > Rating Scales
b. Career Management – > Rating Scales
c. People -> Rating Scales
d. People -> Enter and Maintain -> Rating Scales
Answer: b
Career Management – > Rating Scales
Explanation
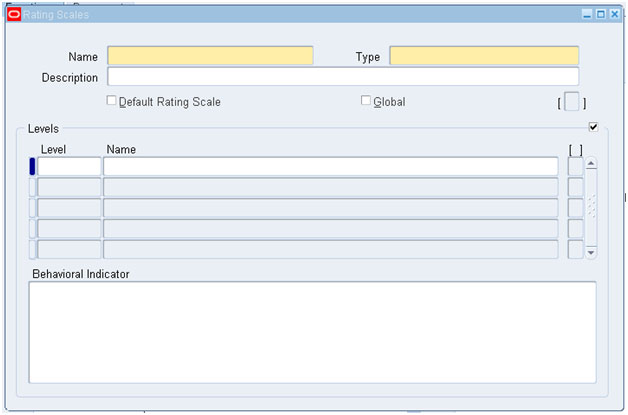
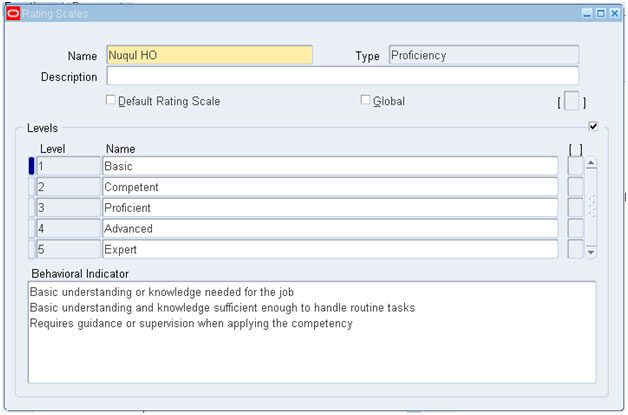
Define New Rating Scales:
Path Career Management – > Rating Scales
1- Enter new name.
2- Enter Type from LOV.
3- Enter description if you want.
4- Enter levels for this rating scale.
5- Press save (B).
Q4) In which form can you define a list of universities to choose from it while defining employee data?
a. Qualification Types
b. School and Colleges
c. Competencies
d. Any of them
Answer: b
School and Colleges
Explanation
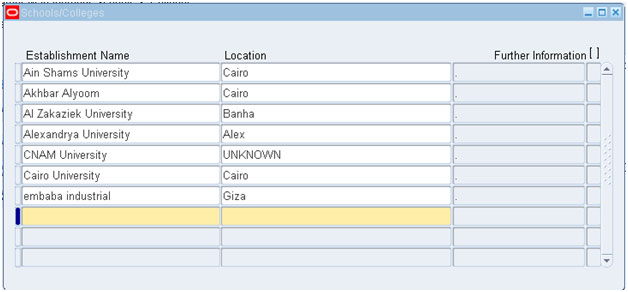
Define New School and Colleges:
Path Career Management – > School and Colleges
1- Press new record.
2- Enter new record.
3- Press save (B).
Q5) Which form can you use to define the level you want to link competence (Business Group, Job, Organization and Position)
a. Competence Requirements
b. Competence Types
c. Competencies
d. Competence Profile
Answer: a
Competence Requirements
Explanation
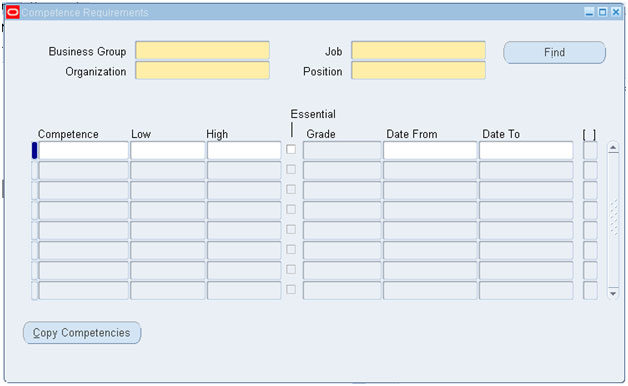
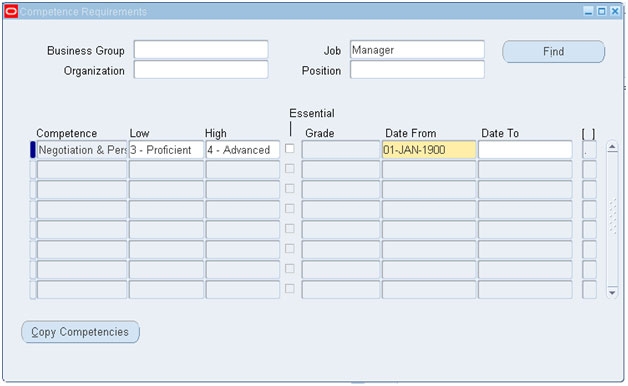
Define New Competence Requirements:
Path Career Management – > Competence Requirements
1- Choose which level you want to link competence (Business Group, Job, Organization and Position)
And press Find (B).
2- Add Competence, Low and high required.
Q6) When you define a new location which scope will you choose if you want the location to only be available within the default Business Group of your current responsibility?
a. Local
b. Global
c. None
d. Any.
Answer: a
Local
Explanation:
Uncheck the Global check box if you want the location to only be available within the default Business Group of your current responsibility.
Accept the default if you want the location to be a global location and therefore available to all Business Groups.
If you are setting up a global location, the location name must be unique across all Business Groups.
Define New Location:
Path Work Structures – > Location
1- Choose scope Global or Local
2- Enter name of location like (NG Head Office).
3- Enter description for location if found.
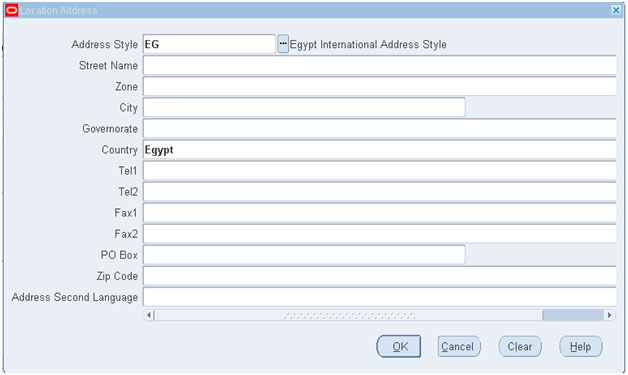
4- In Address Details (T)
- a) Address style required style for address according to country
- b) Address style (ex. Egypt Address style)
Enter all required fields according to locaton details then press Ok (B)
- c) Then enter Time zone filed (Cairo or Amman)
5- Enter required information into descriptive flexfiled
Location Type (HR or None)
Then press Ok (B)
6- Then press Save (B) to save location and can use it.
Q7) Which of the following is the correct navigation to define a new business group?
a. Work Structures – > Organization -> Description
b. Work Structures – > Others -> Business Group
c. Work Structures – > Enter and Maintain -> Business Group
d. Work Structures – > Description
Answer: a
Work Structures – > Organization -> Description
Explanation:
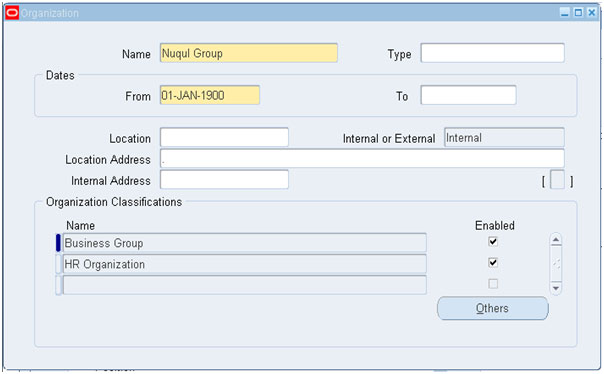
In the process of defining a new business group, it’s the same steps as defining a regular organization, but with the exception of giving it the classification of a business group and enabling this definition.
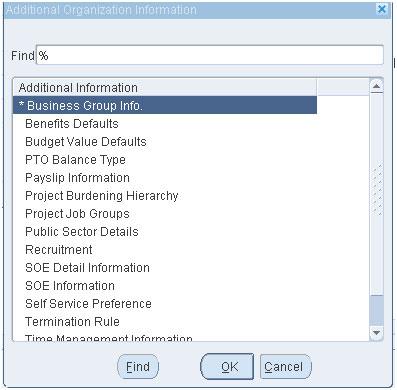
When you enable the organization classification of a business group, and press the “Others “button, the additional organization information window appears and you choose from it the business group info.
Define business group
Business Group:
In the process of defining a new business group, it’s the same steps as defining a regular organization, but with the exception of giving it the classification of a business group and enabling this definition.
When you enable the organization classification of a business group, and press the “Others “button, the additional organization information window appears and you choose from it the business group info.
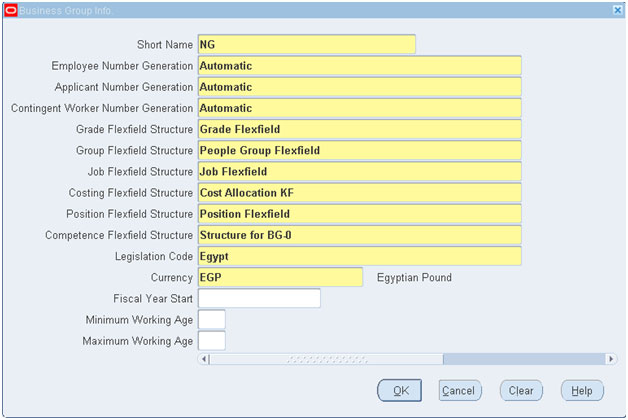
Here in the business group info window, you define the employee numbering systems as well as applicants and contingent workers too.
Also you get to define the Flexfields that you have prepared containing the required information you want your application to contain or show.
Choose the legislation country and code and also the currency you want the application to use.
But be careful as once you have entered this information and you saved your work, you won’t be able to change them, except the numbering sequencing which requires you to run a certain process.
As for the flexfield Definitions, You Choose, they can’t be changed later.
Then press Ok (B) and return step by step and Save (B)
Q8) Which of the following is the correct navigation to define employee contacts?
a. People -> Enter and Maintain -> Contacts
b. People -> Others -> Contacts
c. Enter and Maintain -> Others -> Contacts
d. People -> Enter and Maintain -> Others -> Contacts
Answer: d
People -> Enter and Maintain -> Others -> Contacts
Explanation:
To define contacts
1- Choose Type.
2- Enter Title.
3- Choose Status.
4- Enter Grade.
5- Choose Establishment.
6- Enter Start, End & Awarded Dates.
7- Save your Work.
Q9) In which tab in position definition form canyou define hiring status?
a. Position details.
b. Hiring information.
c. Work terms.
d. Additional details.
Answer: a
Position details
Explanation
Define New Positions:
Path Work Structures – > Position -> Description
First look after press Description (B)
1- Now Press New (B).
Q10) Which of the following is the correct navigation to define employee contacts?
a. People -> Others -> End Employment
b. Enter and Maintain -> Others -> End Employment
c. People -> Enter and Maintain -> Others -> End Employment
d. People -> Enter and Maintain -> End Employment
Answer: c
People -> Enter and Maintain -> Others -> End Employment
Explanation:
Path People -> Enter and Maintain -> Others -> End Employment
1- Optionally, enter the reason for the termination. You can define valid reasons as values for the Lookup Type LEAV_REAS.
Note: When you enter the termination reason of deceased and an actual termination date, if an employee’s date of death has not been entered in the Other Information tabbed region of the People window, it is set to the actual termination date.
2- Enter the termination dates. Only the Actual date is required. This is the date when the employee’s person type changes. The Notified and Projected dates are forinformation only. The Final Process date is a date after which no further pay processing for the employee can occur, if you are using Payroll.
3- Select a terminated user person type in the Type field.
Note: The Type field is only enabled when the Actual date is entered for the first time. When you enable the Type field it is populated by the default value for your system person type of Ex-employee.
The person type you select is assigned to the person’s record following termination. The person type is displayed as the Actual date plus one day.
4- Select a terminated assignment status in the Status field.
5- When the information is complete, choose the Terminate button to complete the termination.
More Questions? Have a look at:
Oracle E-Business Suite 12 Human Capital Management Certified Implementation Specialist


